5. Setting Up An Aquarium – 16 Basic Steps

Here are the 16 steps you did not want to forget when setting up your new freshwater aquarium.
Whether you’re setting up your first freshwater aquarium or adding to your collection, it’s a good idea to follow a guide to make sure you’ve included everything you need.
Freshwater Solutions 1-3 list the necessary and recommended equipment and supplies for setting up aquariums from 10 to 70 gallons.
Freshwater Solution 1. Setting Up a Small Freshwater Aquarium
Freshwater Solution 2. Setting Up a 20-55 Gallon Freshwater Aquarium
Freshwater Solution 3. Setting Up The Ultimate 50-70 Gallon Freshwater Aquarium

1. Choose A Good Location
Make sure the area can support the weight and is level. Estimate you’ll have 10lbs of weight for each gallon of water. Avoid setting up your aquarium in areas that are drafty or have direct sunlight.
2. Rinse Aquarium
Rinse the aquarium with clean water and remove dust and debris.
3. Set Up the Filtration System
Set up the filter by following the instructions included with the filter you have chosen. Check with your dealer if you run into any problems. Do not plug in the filter until the tank is full of water.
4. Add Gravel
Rinse gravel if needed with tap water and pour gravel into tank covering bottom of the tank 1-2 inches deep. Some soils and gravels should not be rinsed such as the aquasoils from Mr Aqua, UP Aqua, Carib Sea and Azoo for planted aquariums. Check the instructions on the bag. More substrate may be needed if terracing or multiple elevations are desired for the aquarium.
5. Decorate the Aquarium
Arrange ornaments, rocks and plants in the tank remembering to provide adequate hiding and sleeping places for the fish. Add any live plants of your choosing at this point but keep them moist.
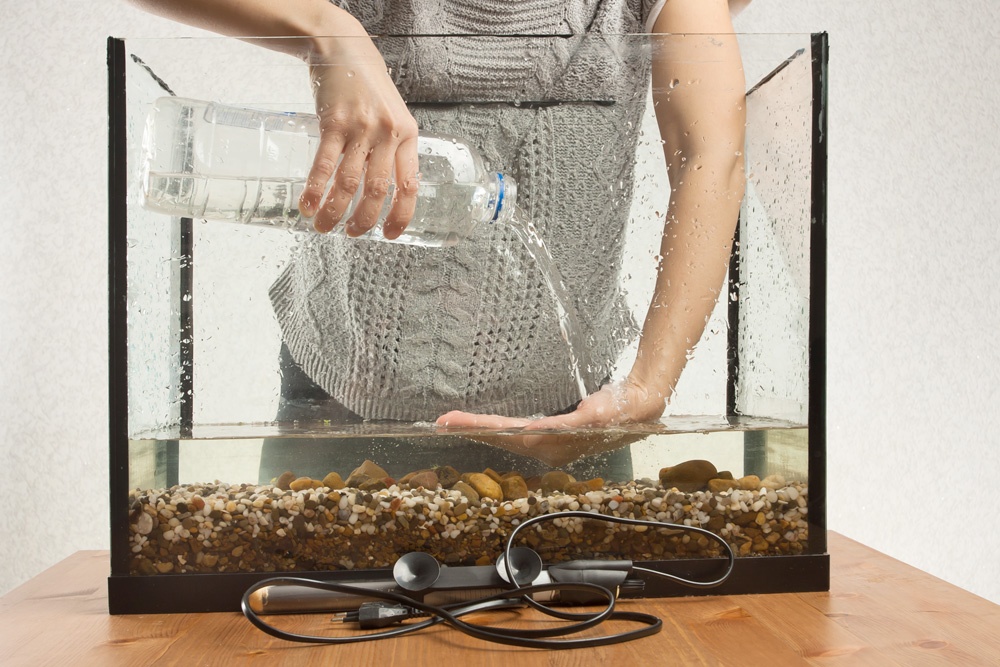
6. Add Water
Carefully add water and re-decorate anything that has moved out of place. Pour water slowly against the tank wall or into a dish or colander placed at the bottom to keep from splattering and dislodging ornaments or aquascaping.
7. Hook Up Air Pump and Accessories
Install the air pump, check valve, and gang valve. Install the heater, but do not plug in the heater until the tank is full of water.
8. Add Water Conditioner
New tank water and any water added during water changes must be de-chlorinated. Follow instructions on the bottle carefully.
9. Start Filtration
Once the filtration equipment is in place and the tank is filled, start the filter following the power filter instructions. Also start the air pumps.
10. Place the Thermometer
Attach the thermometer to the side of the tank or in the water (depending on its type), making sure it is in an easy place to read.
11. Place the Lighting
Attach the hood or glass canopy and light.
12. Getting Ready for Fish
Test pH and make any water changes that may be needed. After temperature and pH are adjusted, you are ready for starter fish. Choose Activate as your culture, follow the instructions.
13. Adding Fish
You are now ready to add a few fish (5-10.) depending on the size of the fish and aquarium. Follow the Acclimation Procedure for introducing fish. Always add Activate when adding new fish. make sure you understand cycling the aquarium. “Fish less” cycling with aquaLife Ammo would start at this step if that is the cycling method chosen.
14. Adding More Fish
More fish can be added gradually when the ammonia and nitrite read 0. Always add Activate when adding new fish and for aquarium maintenance. Adding too many fish too quickly can cause problems. Be patient!
15. Testing Your Water
Remember that clean, healthy water conditions are necessary for your fish. If you do not purchase test kits, bring in water samples from your new tank frequently for testing. After your tank has cycled, continue to test your water on a regular basis to maintain healthy fish.
16. Getting Help
For articles and advice search our web site or reach out for help. Since 1986 we have been loved helping our customers make their aquarium and pond visions reality.

 Setting Up The Ultimate 50-125 Gallon Freshwater Aquarium