5. How To Install a Pond

Once you have created your pond design, perfected your edging, and selected and measured your liners, it is time to install a pond! By carefully adhering to the instructions below, you can install a pond without professional help.

- Select a site and have a basic idea roughly drawn on paper.
- Determine the size of the liner. Flexible is best.
- Outline the desired shape using string or rope. Circles can be measured from a center stake. Sharp corners in square and rectangular ponds can be done with a framer’s square.
- Excavate the pit leaving ledges and other features according to your plan, remembering to slope the sides. If you want to locate the pond within the lawn, cut out the turf linings and stack them to one side to reset them later.

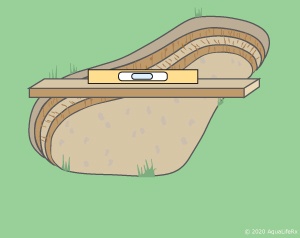
- Check and level the entire rim of the pond by placing a straight 2 x 4 with a level on it across the pond. If your pond is too large for this method, stakes can be temporarily placed in the center of the pond. Level these stakes to each other, then level all points along the pond edge to the center stakes. Remove or add soil at high or low points until the entire rim is level with the center. One section should be slightly lower to allow run off. Direct this low point away from traffic and leisure areas of the garden.
- A shallow 12-18 inch wide ledge should be cut beyond the rim to allow for decorative fieldstone, mulching, or landscaping that will cover the overhanging liner.
- Remove all sharp objects from the pond. No rocks, roots, or sharp material should be present in any area.
- The bottom of any questionable ground should be lined with sand approximately one inch deep. This is a good practice for all ponds, but it is not always necessary.

- Carefully unfold your liner. The liner will be easier to handle with two people. Drape the liner over the pond and gently let it fall into place. Allow the liner lie in the sun in this position prior to placement. It makes it more pliable and easier to handle. Make sure there is an even overlap all the way around.
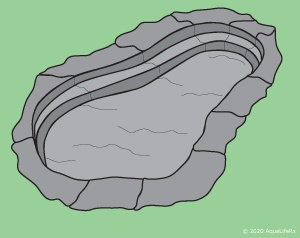
- Smooth out the liner as much as possible. Make sure it fits loosely on all ledges. Stones or other heavy objects can be used to hold down edges during filling. These can be eased off as the water pulls the liner into place.
- Install filtration, pumps, and UV sterilizers.

12) Fill the pond!

13) After the pond is full, the liner can be trimmed leaving a flap 8-18” around the entire pond. This length depends on your edging plan.
14) The pond is now ready for the coping or decorative edging. This should extend a couple of inches over the edge to protect the liner from UV rays. Please see the drawings for ideas on edging.
15) Once you have conditioned your pond, you are ready to add plants and fish. See Solution 11.
